
Try It Out | Breakfast Egg Muffin Cups
- Apr 5, 2016
- 3 min read
If you are in need of a quick weekday breakfast that feels like a treat, this one is for you. So many of us love a great bacon and eggs breakfast but do not have the time midweek to get up early and make that kind of breakfast. That is where these breakfast "muffins" come into play.

*If you're looking for a clever name for these like I was, you may use the term "break-nest" since they're eggs in a nest of bacon. Clever, right? I can't take credit for that one, my boyfriend gets all the glory there. He also got quite the chuckle out of me. What can I say, I appreciate a good play on words.
Ingredients:
12 eggs
1 c. shredded cheese of your choice
12 strips of bacon
6 biscuits (or bread will work just fine)
The first step and my first piece of advice when making this is to bake your bacon in the oven. Not only is this a lot easier and quicker than using a pan but it makes for flat pieces of bacon which in turn are easier to deal with when assembling these cups. It's actually the only way I cook my bacon, it is easier and there is less of an opportunity for oil splatters on me.

You won't want to cook the bacon all of the way, because it will continue to cook with the muffin. I put it in for around 10 minutes. Some of the fat has started to render, but it would not be crispy enough for you to want to eat it yet. Once it is to that point, take it out of the oven and drain it on some paper towels.

Once the bacon is out of the oven, you can add the biscuits. This will give the bacon time to cool before handling. I used Pillsbury frozen biscuits for this recipe, but you could use really any bread you would like. I made five but as you'll see later in this post I ended up making 12 instead of 10 cups. My roommate was very eager to try these and I the biscuits were definitely large enough to slice some into three pieces.


Apparently, if you have the sides touching, they rise higher than if they were separate!
Next is to shred some cheese. I shredded cheddar cheese but you could use whatever cheese you prefer. I had about a cup of it to utilize. You could easily omit this if you are lactose intolerant. Or use veggie cheese like I did for my roommate!

Once you have all of these ingredients ready, it is time to assemble. Your first one may be a little messy, but you can always go back and fix it before you add in the egg. By the 12th one I had figured out the best technique and went back to fix a few of my first to ensure they had enough space to crack an egg on top. The goal is that the bacon on the sides creates a tall wall to hold the egg. You want the biscuit to be pushed down into the bottom of the pan.
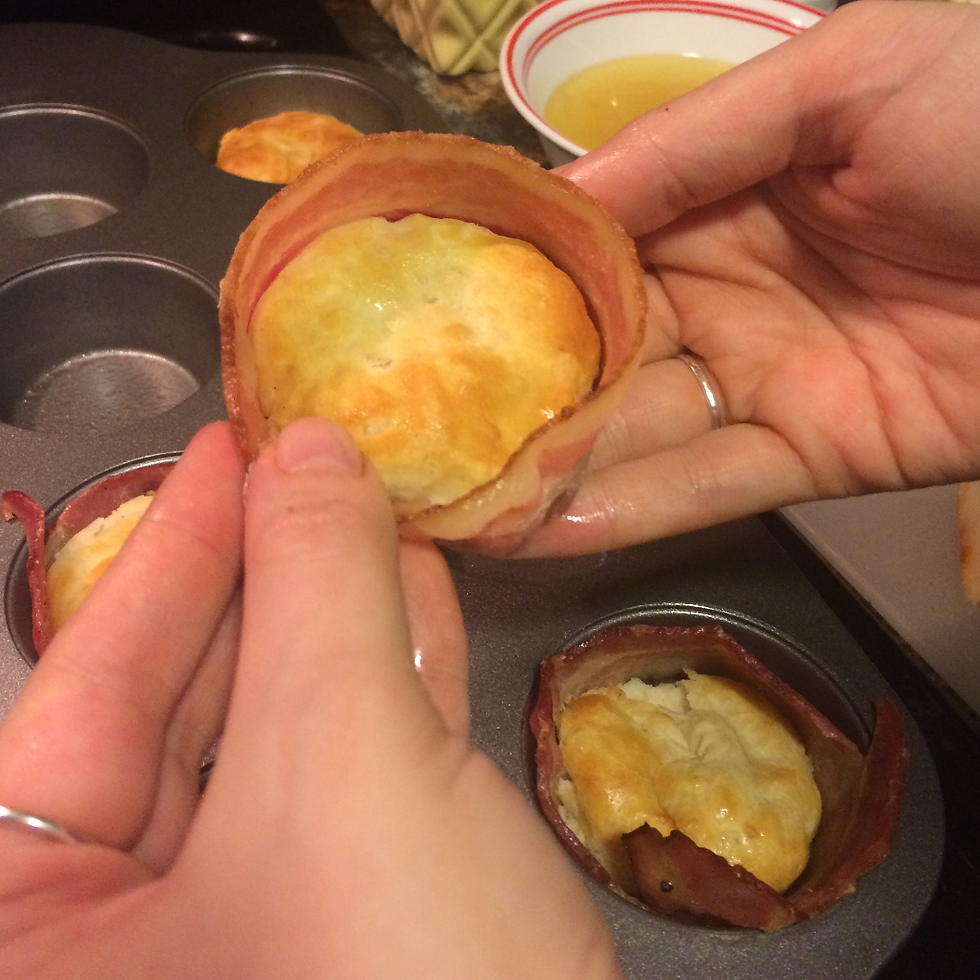
Here is a close up of what your cups should look like. To create this you will wrap the bacon around the biscuit, making a wall with the bacon. (Click each photo for more detail)


The next steps are assembling the cups with cheese and an egg on top. Then they are ready for the oven!
This is the most crucial piece of advice in this entire post: don't let these cook too long! Since they will continue to cook while they are cooling and will be reheated in the microwave, you want to take them out while while the egg white is not fully white. Trust me on this. Otherwise you will get yolks that look like hard-boiled eggs instead of the delicious over-easy consistency.

As you can see above, the yolk is still a liquid consistency and the egg white is not completely cooked. Trust me, this is where you want to be. From here you will let them cool and then they can go in the fridge for the week! I recommend reheating them for a minute and then checking the temperature.
That's it! These can be great to prep for the week or a fun weekend brunch item. Either way, I hope you try them out and let me know what you think.
Enjoy!
-Samantha
Love this recipe and want more? Subscribe here for more tips and tricks in your inbox!
Comments